I love a classic board and batten wall and have been wanting to do one in our primary bedroom for awhile. Let me show you how I did this DIY batten and board wall for the designer look we love.
What is a board and batten wall?
Basically, board and batten is a type of siding. It is where strips of wood moulding (this is the ‘batten’ part) are placed over full panel boards.
The battens hide the vertical seams where the boards have been joined.
You can see from this picture of our cottage, that the exterior siding is actual board and batten.

The textured wall of the exterior is from rough sawn paneling. Those batten boards hide all the seams and keep the panels tight to the house.
Of course, batten and board can be used inside as well for a decorative wall treatment.
What rooms can you do batten walls in?
A board and batten wall treatment can be done in any room you want but is best suited to one that has longer walls.
Where cabinets hang in a kitchen, would not be a good candidate for this wall feature, due to how they cover the wall.

There is not enough of the wall length to see the horizontal board (which is the top board) along with the vertical battens.
Board and batten is best suited in rooms like bedrooms, a dining room, family rooms, a living room, large hall ways, and bonus spaces. Choose a room that has a large wall space to be able to see the detail. A small space would not be ideal but can certainly be done with proper spacing.
I have put this board and batten wall treatment on multiple walls in: an entry area, mudroom, a guest bedroom, other bedrooms, a basement bonus area, hallway, and our current primary bedroom.
I have also used the same DIY board techniques and placed it on ceilings in a kitchen and a mudroom.

Board and batten is an easy DIY project for anyone with miter saw skills.
What is the difference between wainscoting and board and batten walls?
Both are very classic looks, however, wainscoting is much shorter. It is usually placed on the lower 1/3 of a wall, with often, moulding box details. I have put it in our entry, and customized the top rail height.
The board and batten is usually placed higher, and can sometimes be the full height of the wall, particularly for a single accent wall.

The best part is, you can customize it to the look you want and size you need based on your room and desired style outcome.
Is board and batten walls just a trend?
Many ask if a batten accent wall is just a trend. Yes and no. I would answer that it is definitely having its moment, as DIY board and batten is an easy project, even for a beginner.
But this look has been around waaaaayy longer than any of us, as its origins are more utilitarian. I have had a board and batten wall in several of our homes over the years, dating back over 20 years ago.
The photo below shows how this look can be featured on a full wall to the ceiling. This was a house we lived in and renovated 10 years ago.

Does board and batten make a room look smaller or larger?
Whenever making decorating choices, it is always important to consider whether what you are doing will expand your room visually or make it look more cramped.
Board and batten walls definitely make a room look larger. The added layer of design actually healed some of the proportion problems I felt my current room had.
Batten with many middle board lines can add more visual clutter in your space, so consider your overall room design when deciding which DIY board and batten look you want on the wall.

What kind of wood should I use for board and batten?
Depending on the look you desire, there are a variety of woods available for interior board and batten walls.
The ones I find readily available are premium pine and poplar. These choices are great for painting. I prefer a flat simple board with no detail.
There are MDF choices as well, but these are not my favorite to work with but have their advantages, which we will discuss below.
I prefer to use wood over MDF boards for the strips, since MDF can swell and disintegrate if it gets wet. It will also have to be painted, not stained.
If you have textured walls versus smooth walls and need to cover them with panels, use a smooth board to cover the wall. A smooth MDF works best for this situation.

How can I do a board and batten wall on a budget?
The cheapest way to do a DIY board and batten wall would be to use MDF purchased in 4′ x 8′ sheets, then have them ripped into perfectly straight boards for your lattice strips.
You would need to know exactly how much you need, and what the thicknesses would be. This is what I would do:
Make your plan for what your project will look like. Will you want the vertical boards to be the same width as the horizontal boards?
This is a preference thing, there are no hard or fast rules about batten spacing (unless they are covering seams of panels, or you want them only nailed into studs).
Of course, the quickest way would be to use ready made moulding boards. Whatever you choose, boards with a straight cut are imperative.


Head to the big box home store
Go to a home improvement store that will cut boards for you, like Home Depot. I always choose an ‘off time’ to go, that is later in the evening when the store isn’t busy.
Find the employee who can cut long strips on the saw, and choose a large sheet of MDF. 1/2″ thickness works great for this.
Give them your desired measurements. They will set their saw at the first mark and cut all boards needed so they are exact.
Their policy is usually the first few cuts are free and then there may be a cut charge. However, I have NEVER had them charge me an extra cut fee. But this will depend on where you shop, but still worth it.
Doing this would be very budget friendly at the cost of one 4 x 8 sheet of MDF for an accent wall. So if you are DIYing on a very strict budget, this could be a great option for you.
If you are not as concerned about budget, choose a board that suits the look you desire.


Figuring out your board and batten project
Here are questions to ask yourself when making your plan. These are all personal preference.
- Will you be doing an entire room or just one wall?
- Will that wall be floor to ceiling, or have a horizontal board lower than ceiling line?
- Will you be using existing baseboard or matching the entire accent wall?
- Are you starting with pre primed boards or will you need to prime yourself?
- What will be the height of your top horizontal board?
- Do you have textured walls that must be covered with panels?
- What will be your batten placement? Draw everything out and measure.
- Determine how many battens and the spacing.
- Will there be multiple lines, with more than one middle board across your batten accent wall?
- Will your batten boards need to be worked around any electrical outlets or other areas?
- How will your project be finished? Painted or stained board?

How I did my board and batten project
My project this time was our primary bedroom. The room is approximately 17 feet by 18 feet. My plan was to do all the walls in the room, not just an accent wall behind the bed.
The board I used was a base moulding product from Menards. I had planned to use the existing baseboard but decided against it.
I used the same board for the new baseboard, the vertical boards, and the horizontal pieces. However, I ripped the boards down to different sizes for the vertical boards and the top horizontal board.

I determined my height by two factors. One, I wanted it to be higher than my headboard.
And two, I wanted to make sure the horizontal line would be balanced when the horizontal boards meet door and window trim.
Our wall height is 99″. I ended up doing a height of 67″ high. This obviously would provide some scrap boards if I used 8′ boards, so I was able to purchase 12′ ones for less waste. I also chose pre-primed boards to save a step in painting.
Easy DIY board and batten
My walls are smooth so I was able to install board directly to my plaster wallboard.
Using a long level, I drew my horizontal line at the height that I would match up my top board on every wall.

This allowed me to see where the board would be, and how it would look when met near the door trim.
Next was figuring out how much width would be between each vertical board. I came up with 18 inches, which obviously would not hit every stud.
However, I still did use the stud finder to mark studs where I would attach the top board. For the vertical ones I figured, if I hit them “great”, if not “no biggie”.
I drew out the entire room, with measurements of all walls, door and window openings, and outlets and light switches. I wanted to know the exact spacing of where the vertical board meets everything.
Inevitably, when you make your way around the room, you must consider where the batten placements would meet. Also consider wall outlets.
Of course, those two boards weren’t exactly 18″ apart. So the actual width was adjusted slightly working up to the end, to accommodate this last measurement.
Attaching the boards
When installing the wood boards, I used a nail gun powered by a compressor. As stated above, I nailed all the horizontal line boards into wall studs. The vertical boards I would simply nail into my plaster board.
I chose NOT to use any construction adhesive, like liquid nails, when installing board to the wall for minimal damage for the future. The brad nails kept them against the wall enough, and then they would be sealed on every side with paintable caulk.
This is enough to keep them against a flat wall. Construction adhesive would damage the wall if I (or a future homeowner) ever chose to remove them, and I didn’t want to do that.
However, I have used liquid nails when attaching the board to a ceiling. The brad nailer needs to go into a stud somewhere on the piece so it stays up until the liquid nails dries.
I also used a spacer board so I could know the width I needed when I used the brad nailer to attach battens to the wall. I used that same process at the top and bottom of each of the vertical pieces.

Tools needed to complete project
If you are an avid DIYer, then you should have all the power tools needed to do a project like this. As a beginner, doing one accent wall would really cut down on tools needed for your project.
More details pop up as you work your way around to each wall, which always requires more tools. Here is what I used:
- miter saw (this is the one I own) substitute – circular saw if you only need a few cuts
- table saw (this is the one I own)
- jig saw, you may need to get around an outlet (this is the one I own)
- small pry bar, if removing existing baseboards from wall
- brad nailer and proper length brad nails for your project
- multiple levels, you will need a straight line in many spots so you need a variety of lengths or a laser level
- stud finder
- measuring tape (you will need exact measurements)
It’s all in the details
If your vertical boards meet an electrical outlet, take a little extra time to finish it off pretty. I use the board to go around the outlet and bring the outlet cover to sit on top of the batten wood trim.
My new baseboard was the same material so my horizontal piece was same depth as vertical. You could vary this if desired.

Covering nail holes and seams
The only bummer about a project this big is filling in all the nail holes created from the brad nails with wood filler. They are pretty small but must be filled to create a finished look. A putty knife makes quick work of this.
You can use a wood filler or other filler product. I used this one.
Do not use the paintable caulk for this process. It does not sand well, and you will need to go over your nail holes with sand paper. Sand smooth every area you filled with wood filler.
When all holes are filled, caulk all the edges of each board placed on the wall. Yea, this takes a while, but be thorough. Have a damp rag handy during this part of the job.
Some people like to use a wet finger to finish off the caulk. I use that technique, along with disposable baby wipes.
Painting a board and batten wall
In a large room, I spray the entire area as I would doors or other trim. I also use the same semi-gloss paint that would be used on trim. This is the link to my favorite sprayer.
You can also hand paint DIY board and batten. This would require a second coat, so it is a bit more work than spraying. Make sure all edges of your DIY board and batten get full coverage. Check each side of the vertical batten board and make sure to paint the top ledge piece.

Latest projects and more to come
My board and batten wall was the first layer in finishing off the room. I have many more projects to come.

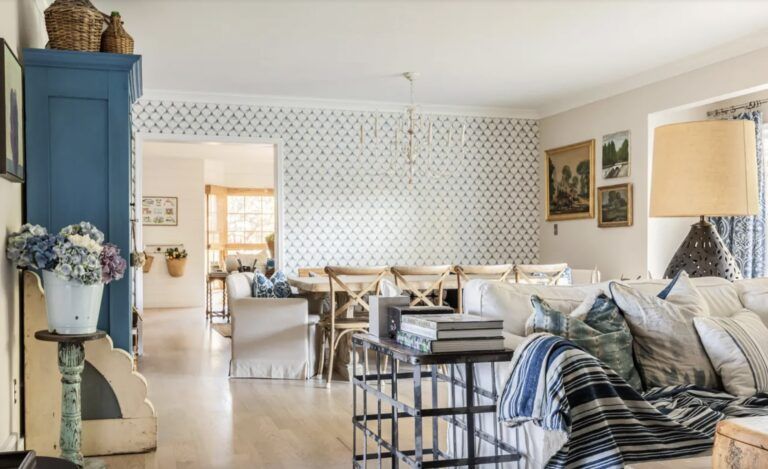
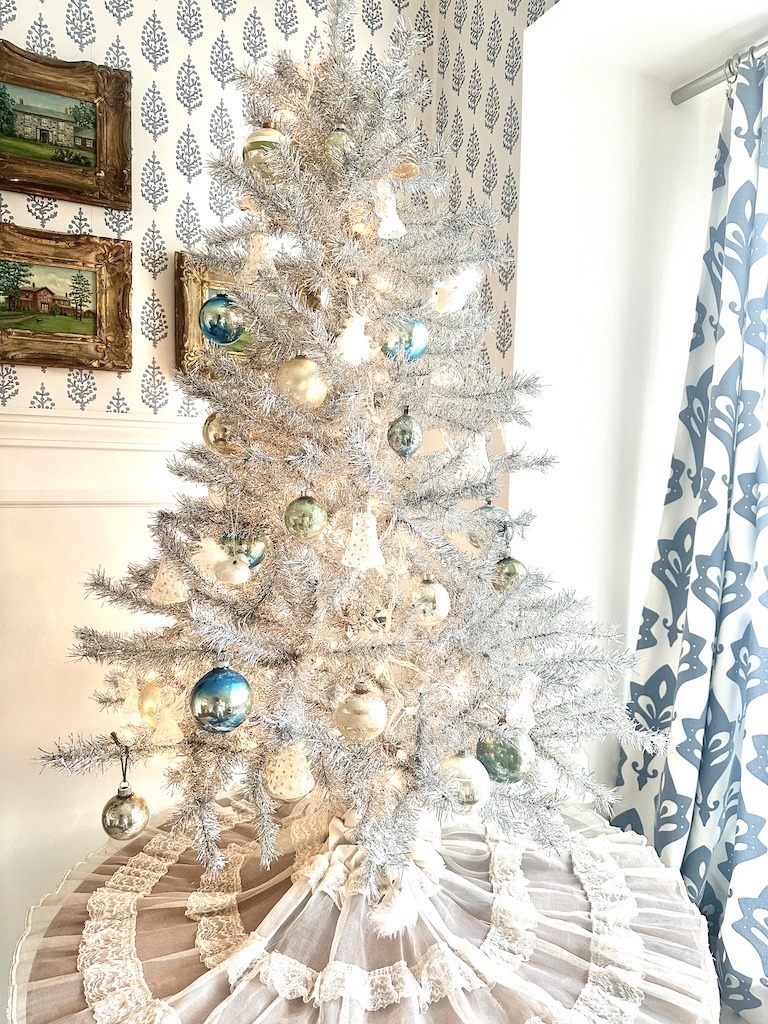
My latest project was installing the wallpaper above the batten wall, and I’m crazy for the overall look. When I put up the first piece, it already made such a huge difference. I love this wallpaper so much!
My window treatments will be getting a custom flair soon and there will be furniture painting projects and lots of styling before I’m done. Stay tuned for more projects coming. Tell me in the comments, what room would you board and batten? Follow along for more inspiration.
Pinterest | Amazon | Facebook | Instagram | LTK