Looking at some of the before pictures, makes me wonder why I wanted to buy this house, but even when I first saw it, I knew an easy DIY wall paneling would be the answer.

The house I grew up in had a nice entry hall, so I’ve always been a big weirdo about wanting enough space when you walk in the door. That’s what really bugged me about our last house, the stairway was RIGHT THERE in your face when you entered.
Total pet peeve, not gonna lie. But this house has a great entry area, even if it started out ugly. Let me show you how I transformed it to be ugly no more!
3 things that can make your entry room more inviting
The key to making any room look warm and inviting is adding your personal style to it. This can be done in many ways. In my entry, these 3 things really made the room standout. They are:
–easy DIY wall paneling
–a fabulous wallpaper, for me it’s blue and white for sure
–personal style using architectural salvage and decorating details
Read more about adding style to your home with architectural details.


Moulding and paneling
The first project I tackled was the DIY wall paneling and new moulding around the doorways and baseboard. There was already nice crown moulding in the room, so that was a win! That would only need paint. But there was this really weird thing going on near the window that would need a custom wall panel. Check this out:

Totally have no clue what that weirdo terracotta step is in front of the window, or if it was original to the house (built in 1957). Either way, that’s a NO for me. That whole window area was a bit strange, so some love needed to be focused there because that affected the entire room.
The fact that it was tile, and I was not going to demo it (why make more work for yourself, ya know?) I couldn’t just nail to it. So I simply used Liquid Nails (a strong wood glue/construction adhesive) to attach the wood strips and smooth plywood that I used to cover it up.
It will be a fun mystery for someone in like 100 years when it gets ripped out and renovated in the far off future!
Don’t be afraid to make those changes that seem completely off in your space. It will make a big difference in the log run!
Use the right tools needed to create the wood paneling look
tape measure
laser level or manual spirit level (gotta get a straight line)
mitre saw or mitre box
wood filler or decorators caulk
finish nailer or brad nailer
paint
Achieving an EASY wall paneling for a DIY project goes so much quicker if your walls are smooth. Luckily mine are, but being originally from Southern California where all the drywall has an orange peel finish, I thought I should mention it.
When your walls are smooth, you can simply get to the business of planning where your moulding will go to give you that full wood paneling look and then getting it up there.

Planning panel height and spacing
Planning how many panels you need and how they will look is up to you, there’s no panel police who come to your house and make sure you have it spaced correctly with standard height, same size boxes, and even wall space.
Good thing, because I prefer to do what I want, and would encourage you to do the same (such renegade behavior). How many panels you need will be up to you. But here is what I did to create these vertical panels, and my thought process behind it.
Height – I chose 57″ from the floor, mainly because I did not want to see the multitude of light switches in this room, and wanted them to disappear within the white of the paneling.
Box size – This was determined by the size of my wall. I didn’t want any huge space to be one big box, so I didn’t have any more than 36″ and spaced them evenly throughout the segment of wall.
Spacing – Based upon the height I chose, the spacing that looked the best for me was 3″. Most windowpane framing like this tends to be spaced between 3-4″, but choose the width based on the scale of your room.
Mix it up for interest
I also chose a different moulding profile for my boxes, meaning different then what I see is commonly used for a project like this. Once again, I like to get crazy and use whatever looks good to me.
I purchased the pieces for the framing and chair rail, and baseboard from Menards. Many like to create the shaker wall panel look, but this being the entry I wanted to jazz it up a bit.

The door framing was ordered from a specialty wood supplier. Walls, and all the moulding was sprayed using this paint sprayer from Home Depot. To get an ultra smooth finish, I used a fine finish tip which does not come with the model.
The white color is Behr (also Home Depot) called Ultra Pure White. I used this on all our trim around the house, along with the shaker style kitchen cabinets and paneling in the family room.


Finishing Touches
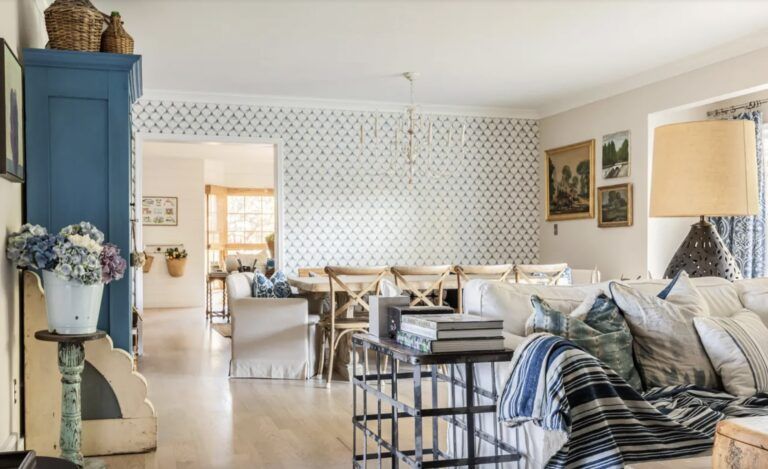
Wallpaper is finally having its ‘trend’ moment, but I’ve always been a fan. I learned to hang my own wallpaper back in the 80s and have been doing it ever since in each house we have owned, some more than others (much to the horror of my realtor and occasionally my hubby). Read more for some secret tips of wallpapering.
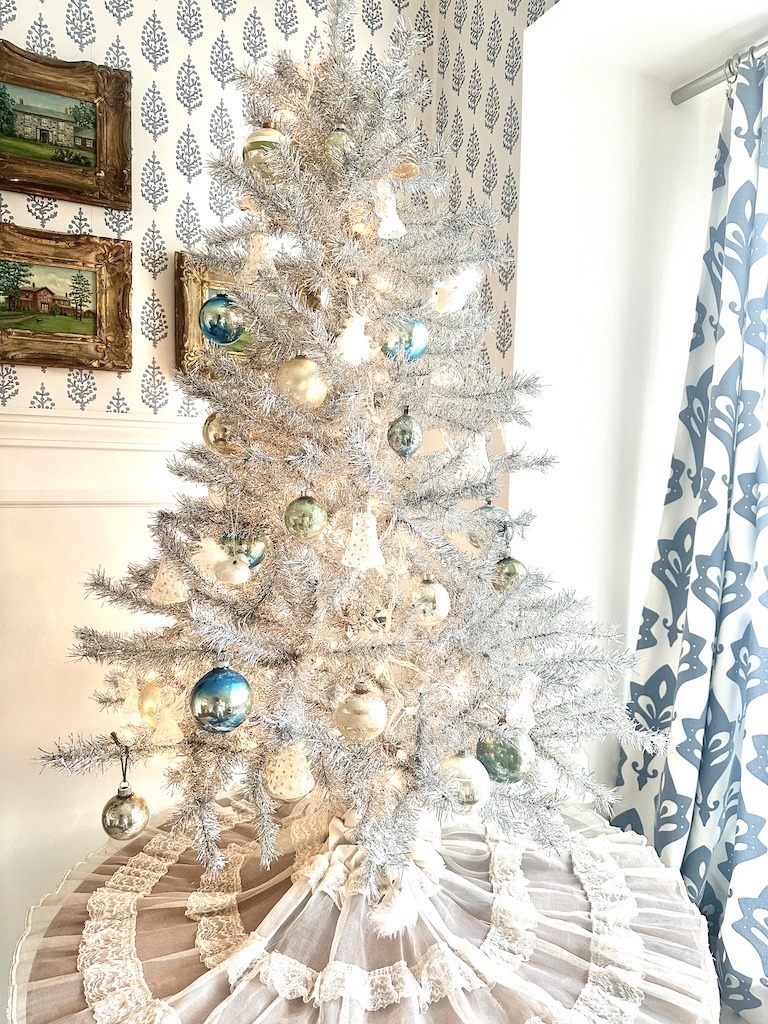
But I feel like wallpaper just makes any space fabulous, and is such a fun layer (to me, at least) to add to a room. I love this simple design from York and chose it not only because it’s fabulous, but it would mesh well with my custom drapes made from an older Serena and Lily fabric that hang in the front window. Plus it’s the perfect shade of blue!

Something special to add personal style
Of course I needed to add some vintage, so I installed this old newel post that I had purchased to use in the last place we were in, but we sold that house sooner than I had expected and never had the chance to use it there. Procrastination for the win!
When I got the tape measure to see if it would fit, I almost peed my pants, it was perfect! I cut it to fit and added some moulding to cover up some holes that were from its past life, along with heavy screws that keep it in place.
Choosing NOT to stain the post to look new was a no-brainer because I like old stuff. If I’m going to the trouble of using vintage architectural salvage to begin with, then I want it for the patina as well as the look. I believe, not everything needs to look perfect, but things should be perfectly straight.

You can also see that I did this project BEFORE painting the floor with the chalk and clay paint. I knew I would probably get paint on the floor. And of course, I did. Well not me, Otis did. He walked through a splotch that must have been on a drop cloth on the other side of the room, and traced little puppy prints all over the floor.
I just left it like that for several months, since they looked pretty cute and I was painting the floor anyway later! Besides, hopefully everyone would notice the new wall treatment and not the paint on the floor.

What Do You Think?
So that’s the big entry hall makeover! What a difference, especially when the floor got painted. If you missed that story, you can read about it here. And I’m so happy that stupid tile is gone near the window. Of course, this is the view most days when I arrive home. It’s Otis’ favorite sunbathing spot.


There are still a few projects that I haven’t gotten around to in this space, namely new exterior door knobs. There are crystal knobs with polished chrome detailing throughout the house that we added, but I’ve always got more to do.
Did you notice that this mirror has a twin that is at the end of the hallway? Let me know in the comments if you spot it, vintage for the win! Follow along on these platforms for more inspiration.
Pinterest | Amazon | Facebook | Instagram | LTK


Hi! Do you have the link to the molding you chose?
I purchased it from Menards and checked their website to see if I could find the exact one. It wasn’t there but there were a few similar ones. Whatever you have close to you, Menards or Home Depot or Lowe’s, I’m sure will have something similar. But local lumber yards usually have more options, so if you have one, I would check there!
This looks great! I am inspired to do this with my foyer and stairwell. Is your Behr Ultra Pure White paint for the trim and walls a shell or semi-gloss finish?
The paint I use for all my trim and doors (and I would consider any paneling part of trim) is a semi-gloss finish. And YES! Do this! It is super easy, and if you have smooth walls to start with, it makes it even easier.
Just discovered your blog and wow I’m hooked. I will be doing the painted slate project in our master bath very soon. Wondered if you remember where you purchased the rug in front of the door from? It would be amazing in the new master bath. Thank you, Jessie
Thanks Jessie! Sadly, I do not have a source for the rug in front of the door because I purchased it vintage at an estate sale years ago. I love the wear of vintage rugs and don’t mind the imperfections. To me, that makes it perfect. Good luck on your project, and please tag me in a picture if your share it on social media. I would love to see!