Vintage Camper Project – Part One
Summer is finally here and once again it’s time to head up north and enjoy our PURE MICHIGAN! You’ve seen Jill’s adorable cottage, now it’s time to show you the our old camper remodel, AKA our summer home. This is the vintage camper project part one that we did.
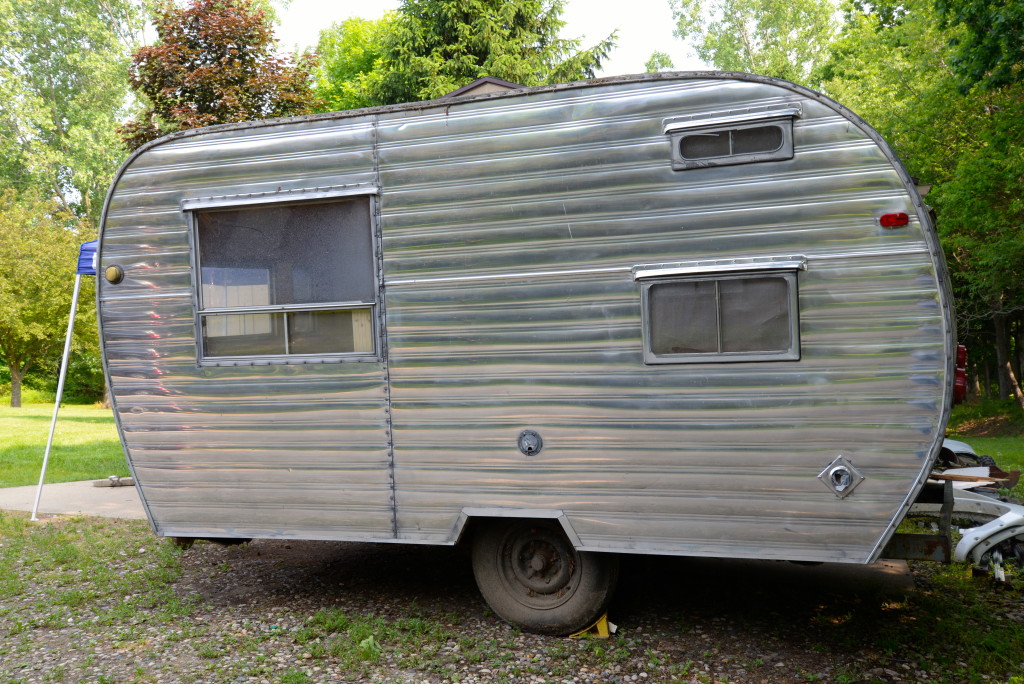
Vintage Camper Remodel
The story of our old camper remodel began approximately 3 years ago, when I went to a local auction to pick up furniture for the Bungalow 47 shop and came home with this beauty. Brian and I have always been campers, but our version of camping usually includes 5th wheel campers, diesel trucks and toy haulers. Our camper is our tiny house on wheels.
Now that our children have grown, we’ve decided to downsize into something a little cozier. With a family camping trip rapidly approaching, we realized we better get busy transforming it into something that would function for the two of us and was more our style for our tiny home. This is our vintage camper remodel transformation.
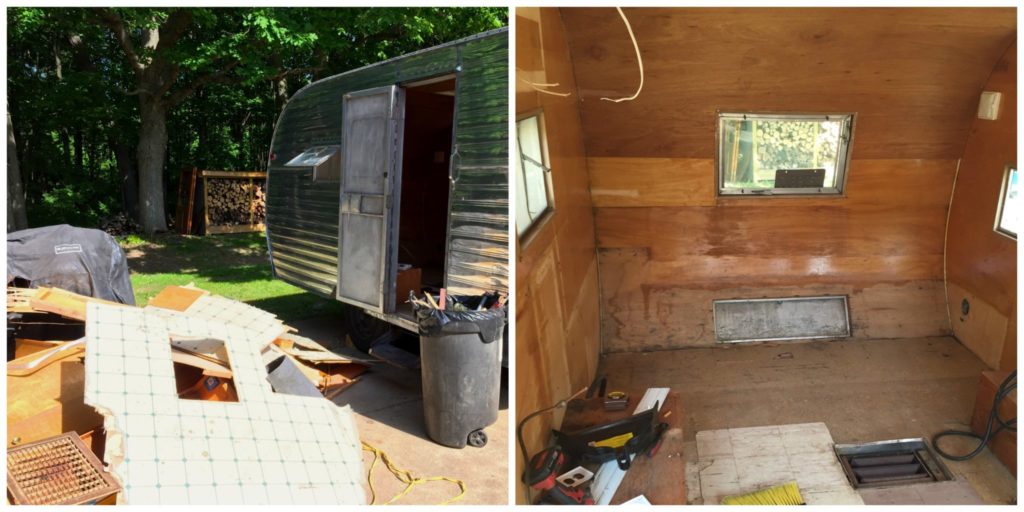
Camper Demolition
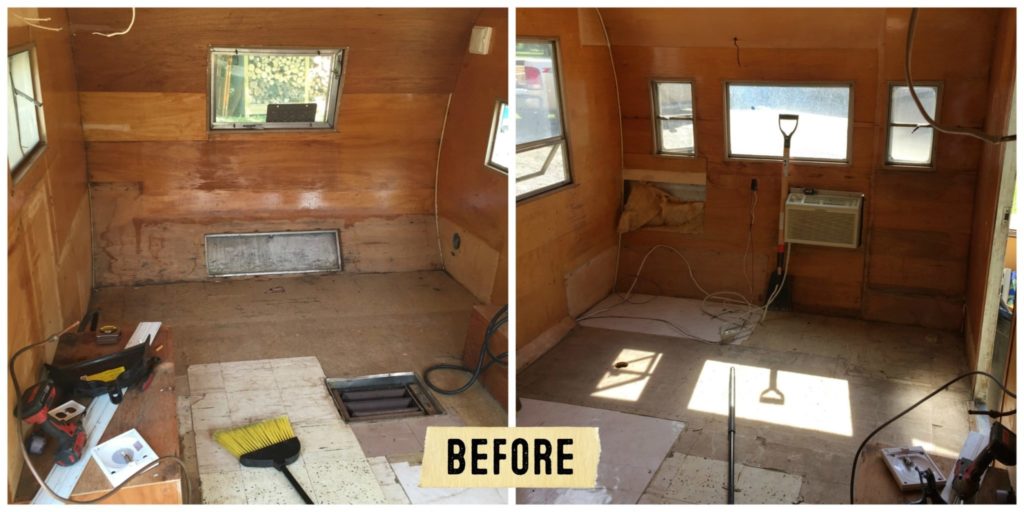
We are not new to RV renovation, and I have always loved old campers. The most fun is DEMO DAY! We started this renovation project by gutting the whole camper. This is hard work, but so satisfying.
We removed the old cabinets, dining area, all the light fixtures, benches and layers upon layers of various flooring. Gone went the gross contact paper, siding with water damage. Almost everything would need to be replaced. Right away, it made a huge difference and made the space feel bigger.
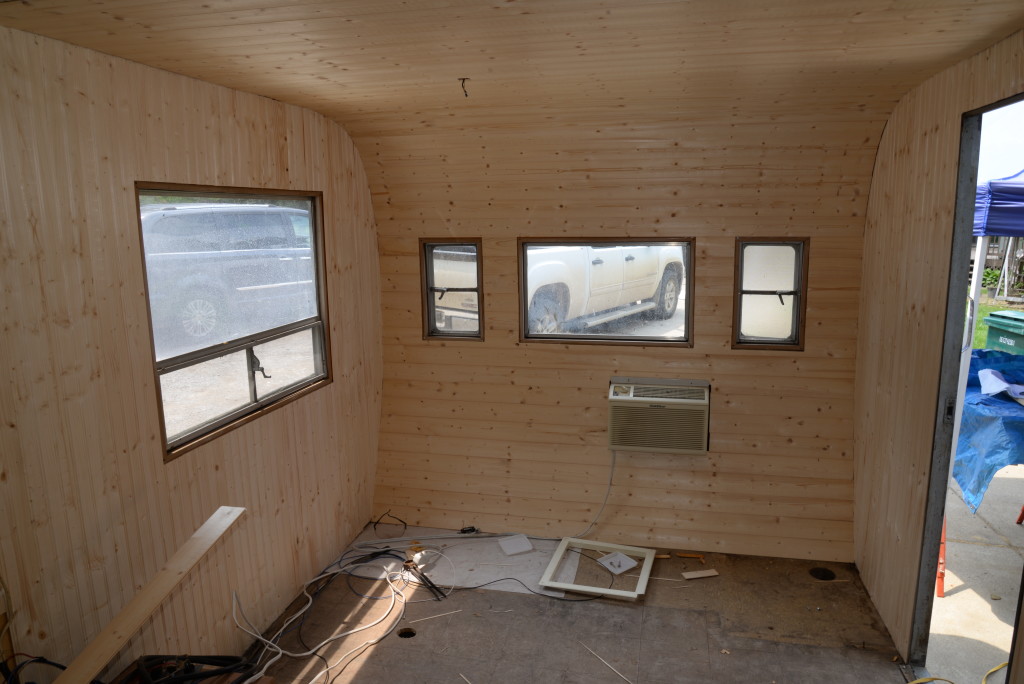
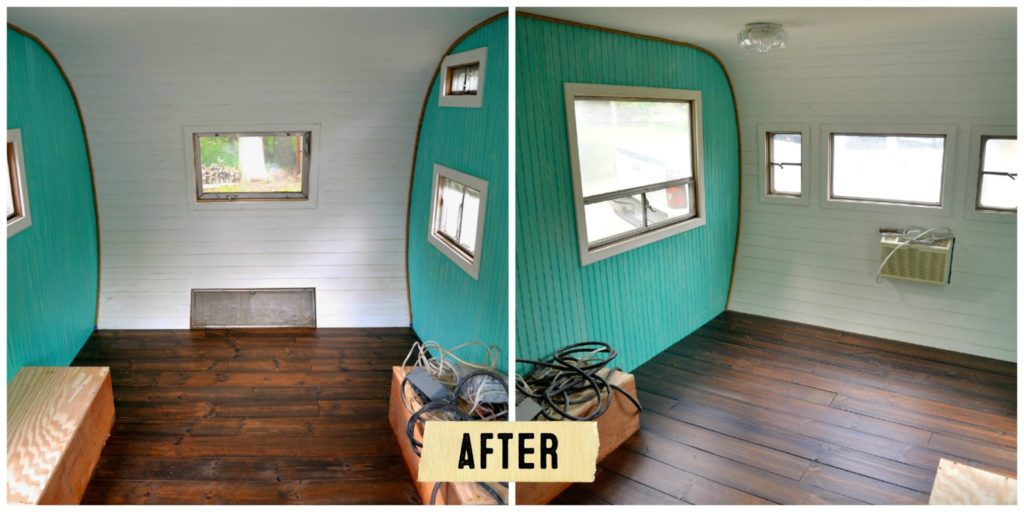
Next, to give it a more modern look, we lined the walls with unfinished beadboard. These would be painted and distressed using our chalk and clay paint. The interior got a brand new feeling.
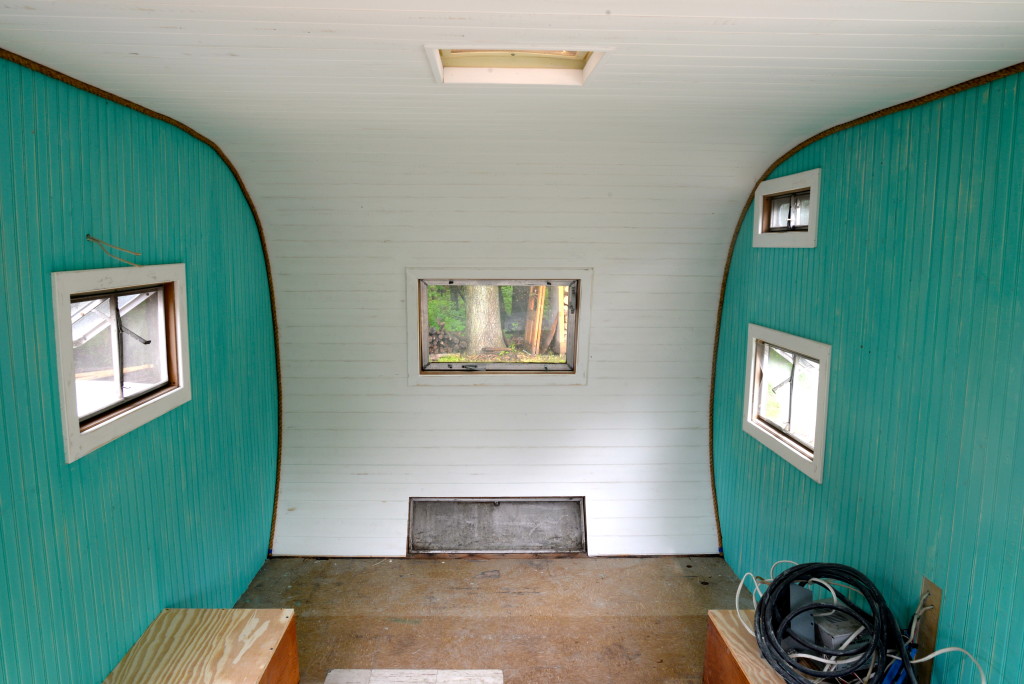
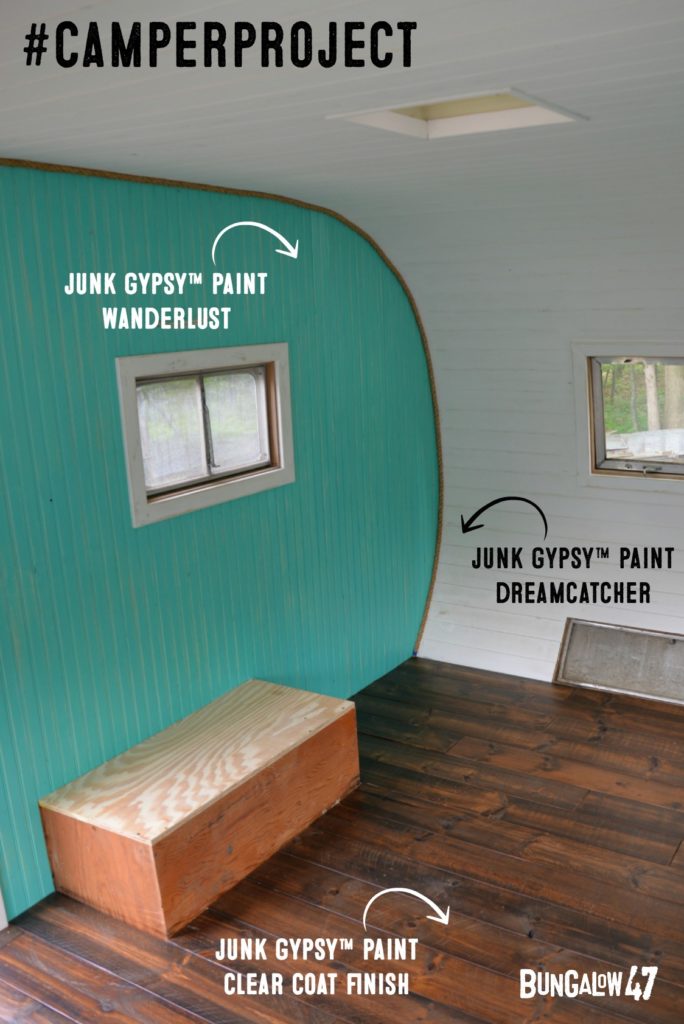
After conducting a quick Instagram poll of what color the walls should be painted, we decided Dreamcatcher (white) which we had private labeled for Junk Gypsy Paint but is Subway Tile in the Bungalow 47 brand. The curved walls and ceiling would be Wanderlust (turquoise) which is Lava Lamp in the Bungalow 47 brand. The turquoise is really eye catching and brought the interior to life! We painted everything and distressed it with a fine grit sandpaper.
Wood for the Floor
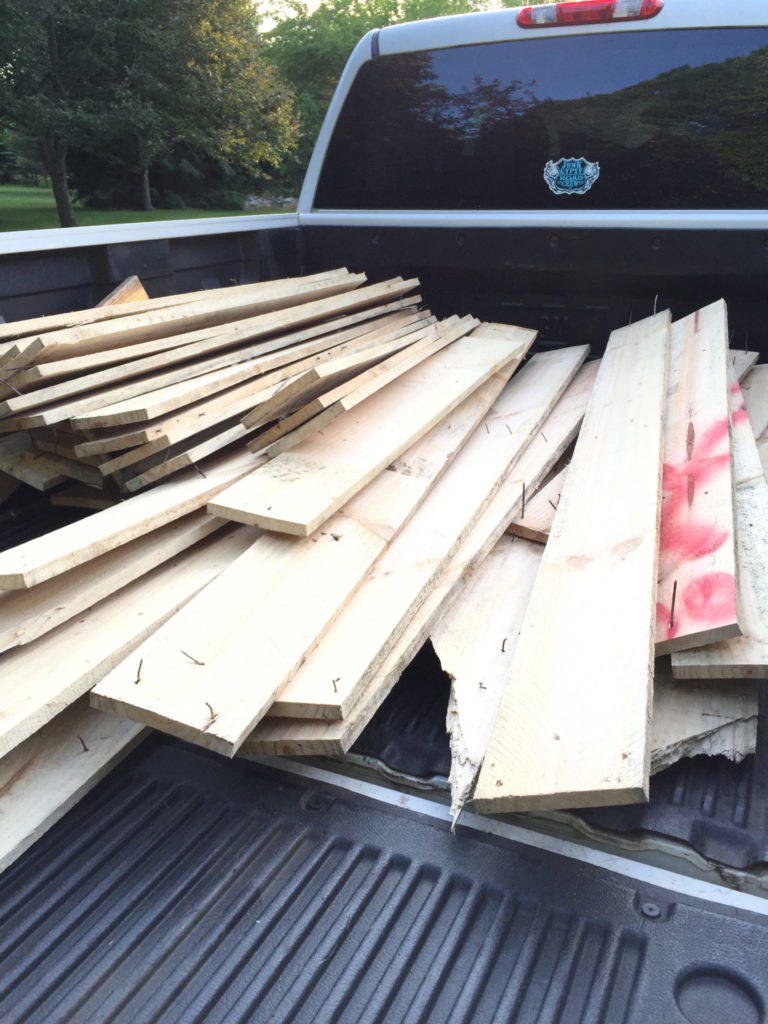
Once the walls were done, we turned our attention to the flooring. After shopping the flooring selection at Home Depot we determined we needed a thicker floor (due to the uneven surface in the camper) and so we picked up a truck load of pallet wood. The price was right (free) but it did require a more hard work to prep the boards.
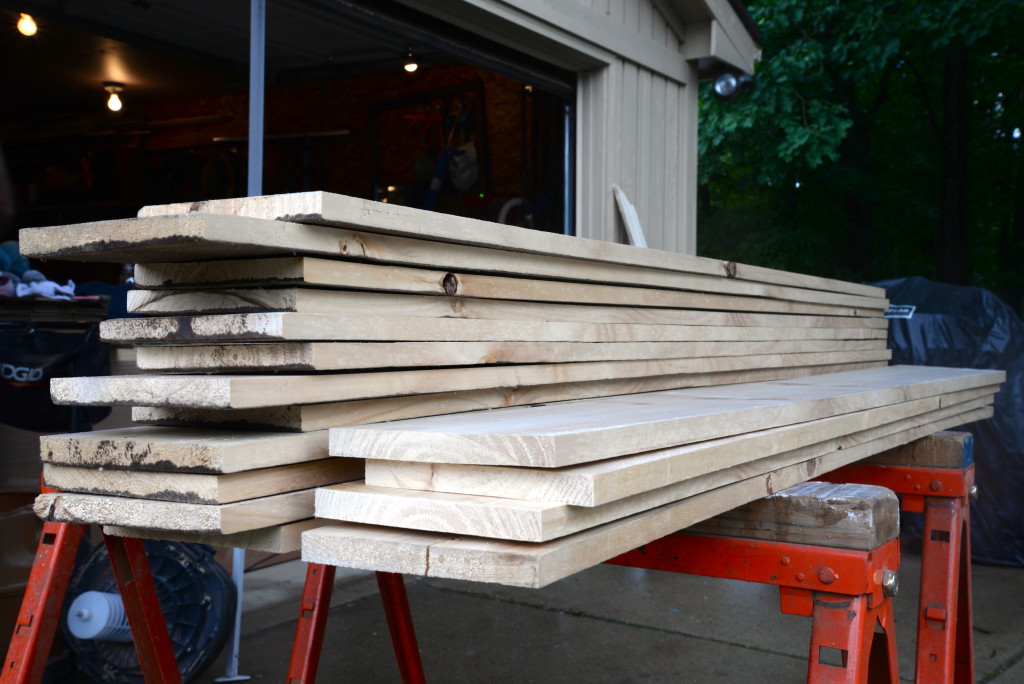
The boards were full of nails that needed to be pulled, was uneven and different thicknesses. We pulled the nails, put them through the planer and then ran them through the jointer giving them a more finished look. That hard work paid off because what we were left with was wood that looked brand new!
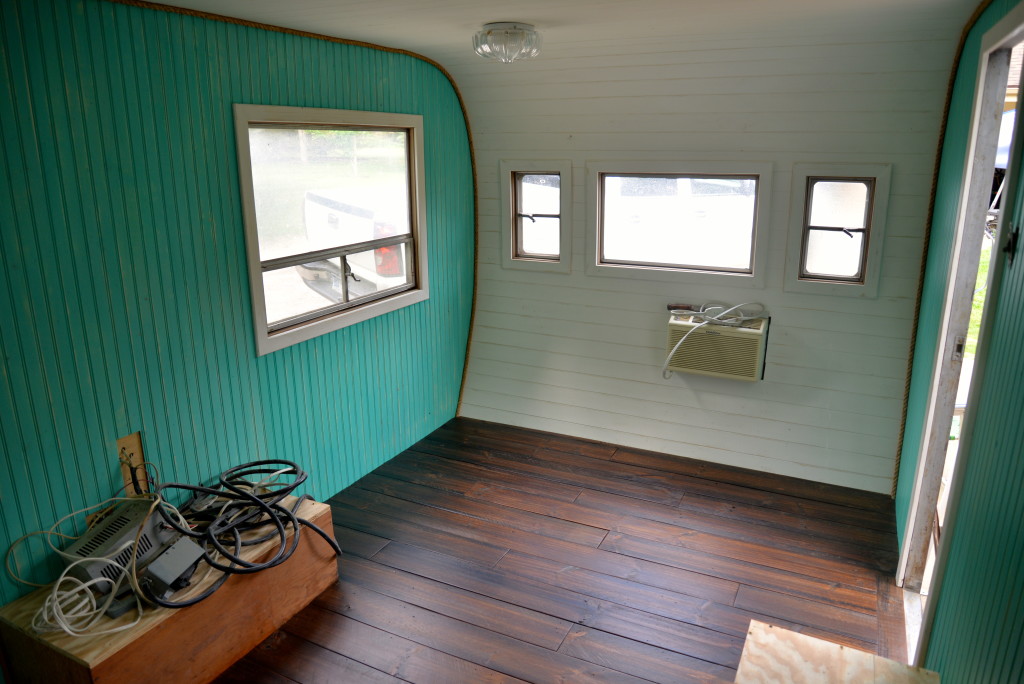
Once the floor was down in our old camper remodel, it was stained. We chose a darker color to stand out against the white paint. We finished it off with a fresh coat of matte finish.
Finishing Touches for the Camper
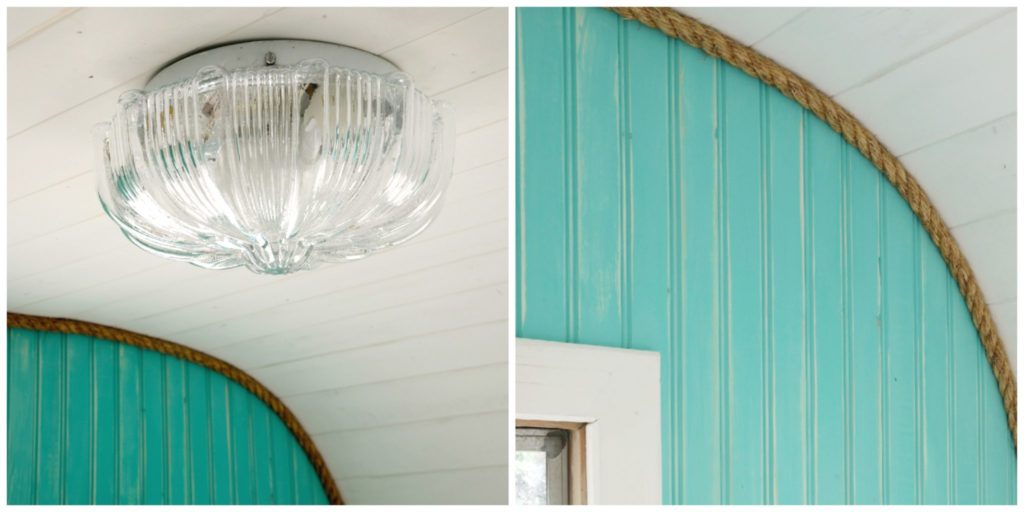
We also added a few other little details to the shell remodel. This adorable light fixture came from our local Habitat for Humanity store. It was a bargain and gave the living space a real homey feel. We added rope trim which was a perfect solution for edging the round contours of the camper. We simply glued the rope in place with gorilla glue.
The camper remodel was coming along. We turned our attention to adding the sleeping area and storage space. I will share in another post all the fun facts of how we did the bed frame, added window treatments and other cute stuff we have picked up at flea markets. Here is the link to the blog post for part two. Hopefully you can get some inspiration for your own old camper.
Old camper remodels aren’t always easy, but if you’re handy, they sure are satisfying. I can’t get enough of vintage campers and would love to do another one. The tiny home appeal is so fun and renovating this little travel trailer made me want to head out and hit the road.
We still have a bit of work to do on the exterior, and a few things to replace on the door. But we will take a bit of a rest, and get part two of our renovating project going. Stay tuned!
For more design inspiration, follow our boards on Pinterest.
Thanks for stopping by,
Chantelle

Hmmm, don’t really know. This was done a few years ago, but the guys are always careful, so I would guess YES.
I am currently restoring a 1968 shasta camper. Were you worried about asbestos? We are wearing masks and suits but wondering if it crossed your mind.
So glad you like it. The colors are fun and bright, and when you do your project I’m sure you will choose the ones right for you. But don’t forget to be a little bold, color certainly can make a difference in your mood!
I have quite literally combed through the entirety of the internet for ideas to remodel my old camper I bought last summer. There’s not a single picture out there I have not at least looked at. lol. Yet, this is what I come back to. I absolutely LOVE everything about this. So many ideas I go back and forth on but this one remains constant. My camper isn’t quite the same shape but this will be my main reference when I start my project. Beautifully done!! These would not have been colors I’d have considered, but the end result is balanced so perfect.
Hi Christine, the bead board used comes in long strips, about 3″ wide x 8 feet long. It is tongue and groove. Because it is thin, it was more pliable. I don’t recall if this was done for this one, but in the past I have done other projects using thinner wood like that that needed to bend slightly, In those projects, the wood was soaked in water first to make it more bendable. We are able to find the bead board strips at our local Home Depot, but we do know, products are very different based on geographical needs. Hope this helps!
Your camper is just adorable!! I have a question about the walls.. when you say you used individual pieces of beadboard, do you mean 4ft×8ft sheets of beadboard paneling? If you meant individual pieces, what size pieces and where did you find them? I’m also confused about how you were able to follow the contour of the camper without having to bend your wood? I realize this was posted years ago, any resources you might have would be greatly appreciated! Thank you so much for sharing your renovation, you have given me ideas I never would have thought of!
So glad it worked out for you!
Your rope idea for trim was the BEST idea ever. We totally had to redo the ceiling in a 1964 Nomad and we could not think of anything that would bend easy to do the trim. I saw this and this was the winner. Thank you so much for sharing it. It turned out so dang cute and super easy to do. We used glue and screws to hold it and it’s PERFECT. Thank you again for a great idea.
That sounds great Jeannette, what a nice idea!
I wish I could afford
Several reclaimed
Caravans, so they
Could give homeless people a chance of home of there own,
Wherever they stay
Not really sure, this project was done a few years back.
Love, love it!! What color of minwax stain did you use?
Hi Tanya, The rope was attached with glue and some brads. Thanks so much for checking this out.
I love the rope trim. How was it attached?
Here: https://bungalow47.com/little-tin-can-camper-part-2/
Here: https://bungalow47.com/little-tin-can-camper-part-2/
Where can I view the second part? I can’t find a link. Thanks
Where can I find the finished product?
That looks awesome! It’s giving me hope that I can actually re-do one!
Hi. Great job I love the look. Did you use individual beadboard planks or larger like 4’x8′ boards? If you used the larger boards, how did you curve them round the curve of the camper.
Love it. We are trying to fix 69 forrester. Where do we get the bead board boards 4 in x 8 ft
Menards. Is it called exactly that. Do we screw or nail or glue it to the 2 x 2s on the wall.
My husband and I are refinishing a 1967 Playmor camper about the size of yours. We’re just putting the last of the beadboard paneling up. I’d like to catalog our progress on Pinterest, but I haven’t figured out how to upload it yet.
Thanks for the great inspo!! We are currently renovating an old caravan and are just getting to the part where we can add the trim. Any tips for how to stick the rope up??
Cheers, Christie & Tara ????
Hey guys, great project. Because my partner and me are renovating a caravan which also has an aluminum shell, I am wondering how you got yours so well polished. Any tips for us?
Kind regards,
Vanessa
You can score the backside with a utility knife to get it to flex!
We used pallet wood from over sized pallets. We cut them to length and put them through a planer to make sure they were the same thickness. We glued and nailed them to the subfloor of the camper. The boards were then stained with a minwax color and sealed using the Bungalow 47 Matte Finish product we carry. Good luck with your project. Tiny campers are the best!!!
I am remodeling my camper right now and have been throwing around the idea of putting reclaimed lumber down for the flooring and was wondering how you did it? Did you just nail or screw the pallet boards to the existing plywood or did you have to use a flooring adhesive or liquid nails? I was also wondering what you used for a finish that wolud be able to handle the vibrations from towing it places and the temperature changes without damaging the finish. Thanks for posting your article and pictyres it’s given me some great ideas
Thanks…can’t wait. I have a 1965 RECO canned ham camper and I just can’t seem to get started With the refurb. Hoping your progress will get me going. 🙂
The part 2 will be published on Thursday, October 27. Wait until you see it, it’s sooooo cute!
Is the part 2 on the camper available yet? 🙂
Hi Catherine, Thanks for your inquiry. We actually didn’t use paneling, we used the individual wood bead board strips that are approximately 4″ wide and 8 feet long, so there wasn’t a problem with bending. Thanks, Chantelle
Yes, thanks for sharing!
I am having problems getting the paneling to bend at the curve. Do you have any suggestions?
Catherine
Can I use the before pic in an article I am writing. Would like to give you full credit and a link.
Where’s part two?!?!?
The walls were paneled using bead board trimmed out with rope. The bead board was nailed to existing paneling.
Can I ask what product you used on the rounded ends of the camper for wood? Also, did you go over existing paneling?
Holly, So glad we could offer you some inspiration! The camper was always silver, just needed to be polished. There was no significant water damage to deal with. Thanks for following along with us!
That is awesome! This gives me inspiration for my own vintage camper! Was the outside always silver or did you paint it? Was there any water damage you had to deal with?
Absolutely Love this!! We are currently restoring a 1960 Shasta so thank you for the great ideas! I think we will definitely put bead board on the walls/ceilings. I also love how your corners were a rope!
I love this! It must feel rewarding after a lot of hard work. And I cannot wait for part two. …we are renovating a trailer as well and stuck on figuring out what all to gut.
Hi Chantelle,
Love, Love, Love, the camper!!! I have always wanted an airstream, but this is just adorable……my husband is really nervous!!!! This could be our next project (like we need another one)!!! I can’t wait to see the progress!!!! What a great idea to use the rope to edge the contours!! Keep sending those great ideas!!
Pati
Brian & Chantelle,
it’s a little dream of mine to do what you two are doing. This project is very cool.
Jon
Great renovation!!!! Thank you for sharing it with us. Love the flooring for sure. Teresa
I can’t believe you turned pallet wood into such a beautiful floor. I look forward to part 2 .
Awesome! Looking forward to seeing the finished product.