Layering Four Colors to Create One Great Look
Have you ever wondered how to create the aged look of time on a painted piece? It’s easy using a chalk and clay paint. I will share how layering four colors to create one great look is easier than you think.
Painting Projects To Do
A little over a month ago, Brian and I found a great house on an amazing piece of property and decided to put an offer on it. It’s on a beautiful piece of land with a pond and is quite a bit closer to Bungalow 47 than we are now. Well, long story short, they accepted our offer so now we are in the process of selling our house.
We built our current home almost twenty years ago and have added quite a bit to it since then. When we took a good look around we realized that we really had our work cut out for us in order to get it ready to sell. We had many things on our list. From painting the entire exterior of the home to putting finishing touches on bathrooms and spare rooms, it was a lot.
One of the quicker projects on the list was painting the mirror in the hall bathroom. The mirror was something that I’d picked up from an auction a while back and had always meant to spruce up with a little paint. Of course I had never gotten around to it. So many projects, so little time!
Start With Small Projects
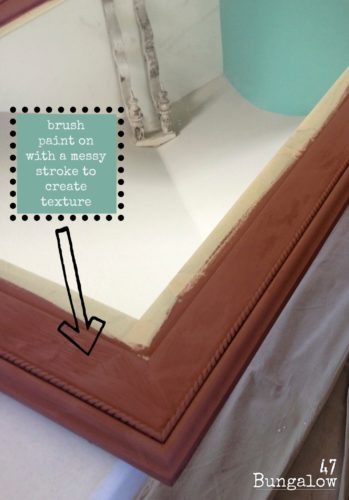
A mirror, being a small piece, is perfect for using sample sizes on. I ultimately wanted it to be red but wanted to have a few other colors popping through here and there. I chose brown, tan, a sage green as my base colors and red as the final top color. I started by taping off the mirror. I find this easier than having to scrape paint off later, it’s worth the few extra minutes before you begin. When I applied the base coat I made sure to paint it ‘messy’ and with a lot of texture.
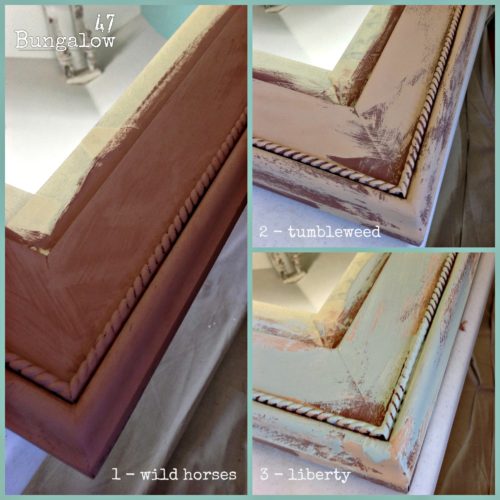
I painted the first coat with lots of texture by pulling the brush back through the drying paint and pouncing in a few areas. Then I brushed the other two colors over it. Coverage doesn’t need to be complete when layering colors. I simply apply it here and there and leave a few areas thicker than others.
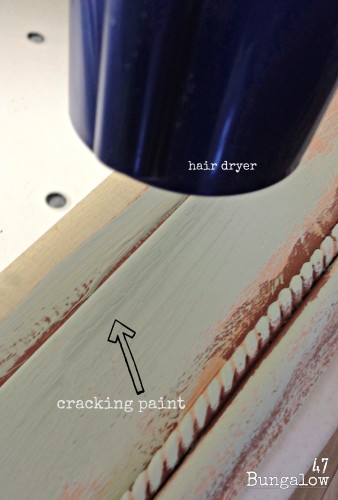
There were a few areas where I left the paint quite thick. On these spots I took my hair dryer, popped it on high heat and let ‘er rip. The heat from the dryer cracked the chalk and clay paint and gave the piece even more depth and texture.
Finishing My Paint Project
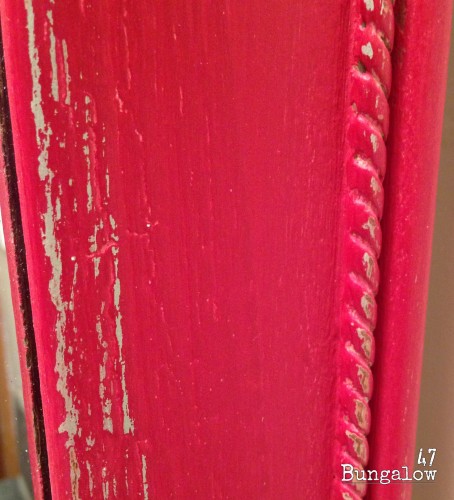
The final color was red. In this close up you can see the cracks in the base coat showing under the red along with some of the other colors peeking through. The entire project took around an hour. It was a much needed improvement on an old dated mirror. Now the hall bathroom has a bright punch of color to complement the salvage signs and striped shower curtain.
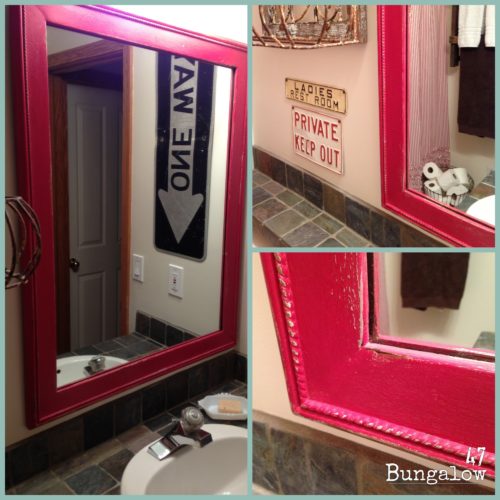
The salvage signs are fun and unexpected in this little hall bathroom. I especially love the One Way sign pointing down. ALL things in the bathroom should ONLY go down. Check out this blog post we wrote about a project we did adding texture.
Follow us on Pinterest for some inspiration.
Thanks for stopping by,
Chantelle

I have a ‘thing’ for potty humor. 🙂 Chantelle
Love the layering!! I literally laughed out loud at the bathroom comment though 🙂