Adding Architectural Interest With Beadboard
Do you ever just look at a space and think it needs something? Me too! Today we are going to talk about adding architectural interest with beadboard.
What is the purpose of beadboard?
The purpose of beadboard is purely decorative now, but it didn’t start out that way. Beadboard originated like 400 years ago with the purpose of keeping heat inside the house, and those cold damp English drafts out. When English settlers came to the U.S. they repeated that architectural character in the homes they built. Think of all the paneled and quaint houses of New England. This surely reminded them of the homes they left behind.
New England is where I first fell in love with the paneled look, specifically Cape Cod. As I adored the cool sand and Cape Cod’s sparkling water, I began dreaming of hydrangeas and painted white picket fences. White beadboard is so classic, and I have a deep love for the look and the place that inspired me. Read about that here.
What is the difference between beadboard and wainscoting?
People seem to use the term beadboard and wainscoting interchangeably but they are actually different. Beadboard has vertical grooves with small ridges between each plank. Typically these boards were hung vertically, and were milled in individual boards that had grooves that held them together. They were then capped off with horizontal moulding to hide the abutted seams.
Now you can purchase beadboard in a large 4 x 8 foot wall panel, in addition to the individual planks. The price is a bit more friendly with the panels. The wall panel will make large projects super easy, but can also end with waste. The single boards are found in wood along with medium density fiberboard (known as MDF) and most wall panels are MDF. I’ve even seen some options in PVC for outdoor applications like covered porches.
What is cheaper beadboard or wainscoting?
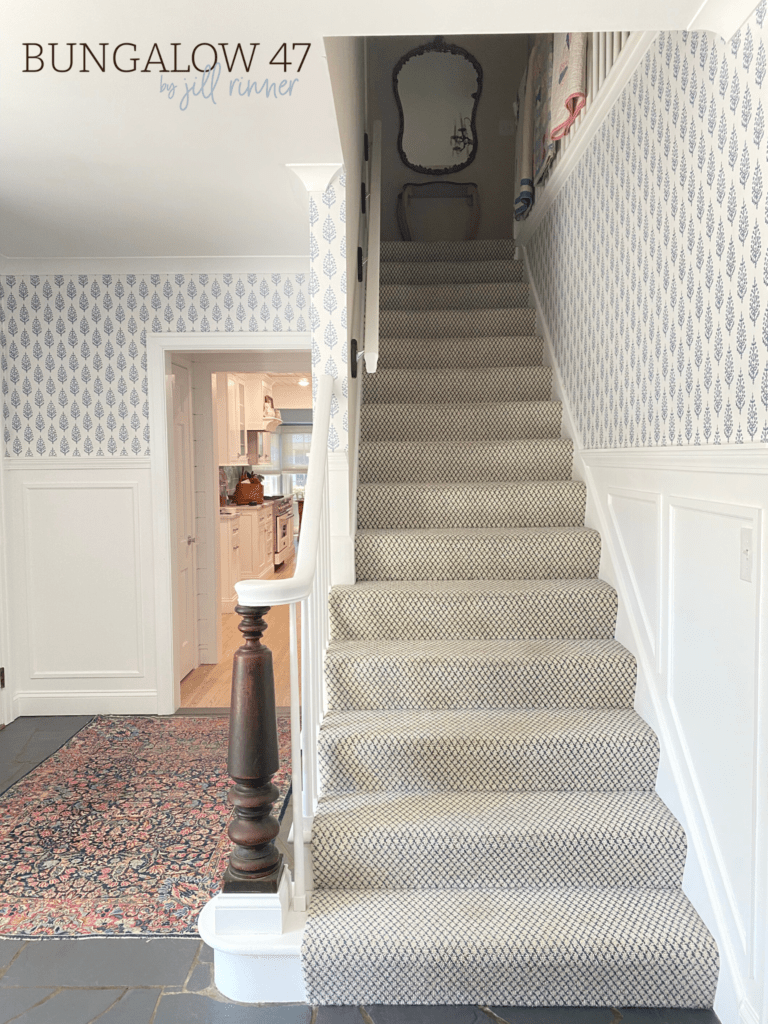
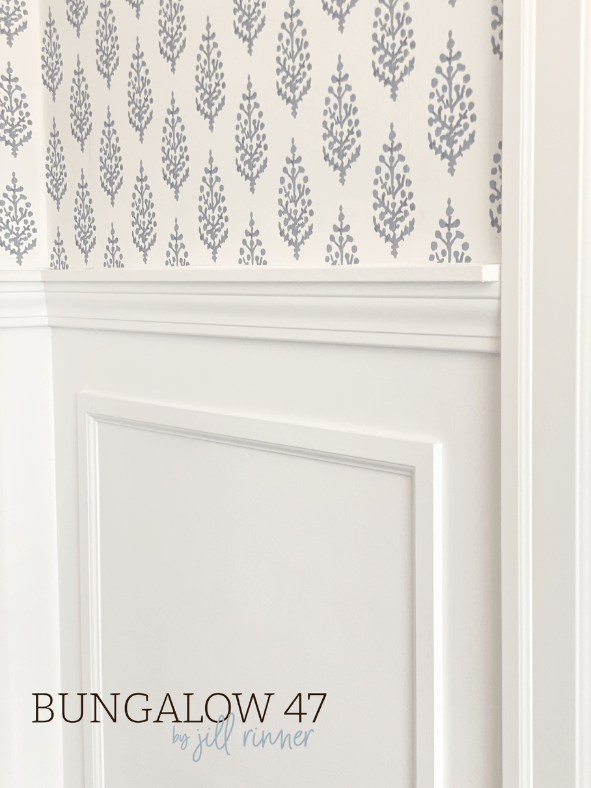
Wainscoting is a word used a bit broader referring to general decorative paneling in many styles. Wainscoting usually has two parts, a panel and the moulding that makes the frame. Heights may vary but typically are in the lower half of the wall. The best part about doing it yourself is there are no rules. You can select the height and look that is authentic to your style and paint it in any color.
You can read about this project I did in my entry way, which is a wainscoting but a bit higher than usual. In creating wainscoting, I was able to skip the panel part due to my smooth plaster walls and get right to the framing part. This definitely made the price of my project much cheaper than using beadboard.
Is beadboard out of style?
As stated, beadboard has been around a long time and is pretty classic. To me, it never has gone out of style, even though you will see it trending at different times. I believe in the last decade, the availability is more consistent and can be found in wood fiber and an array of woods. And being able to have the option to purchase a 48 inch wide panel is great for big projects.
Beadboard Paneling on the Ceiling
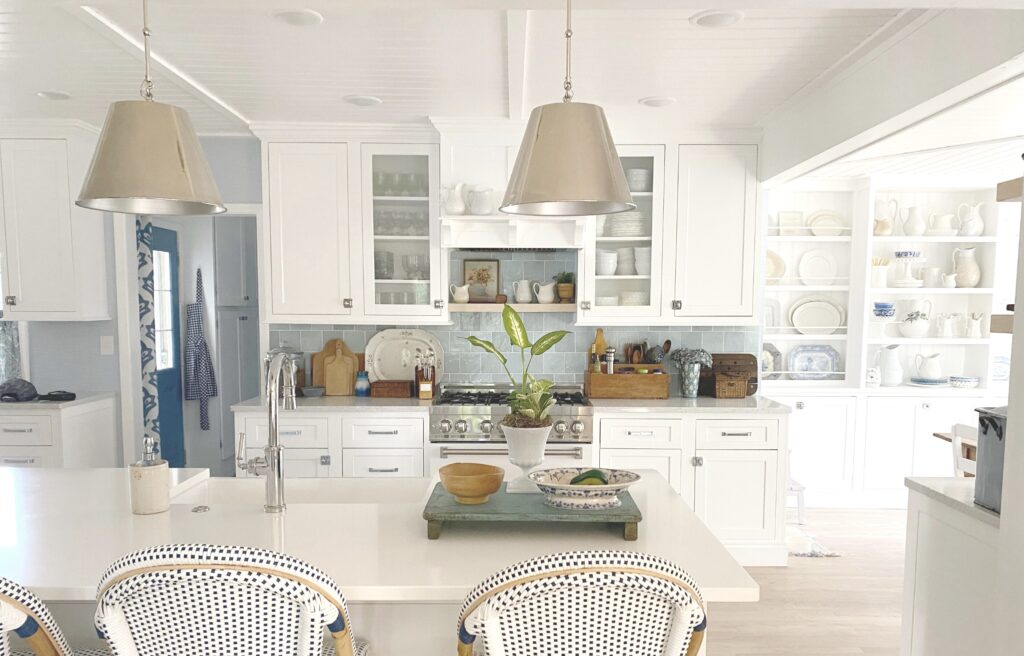
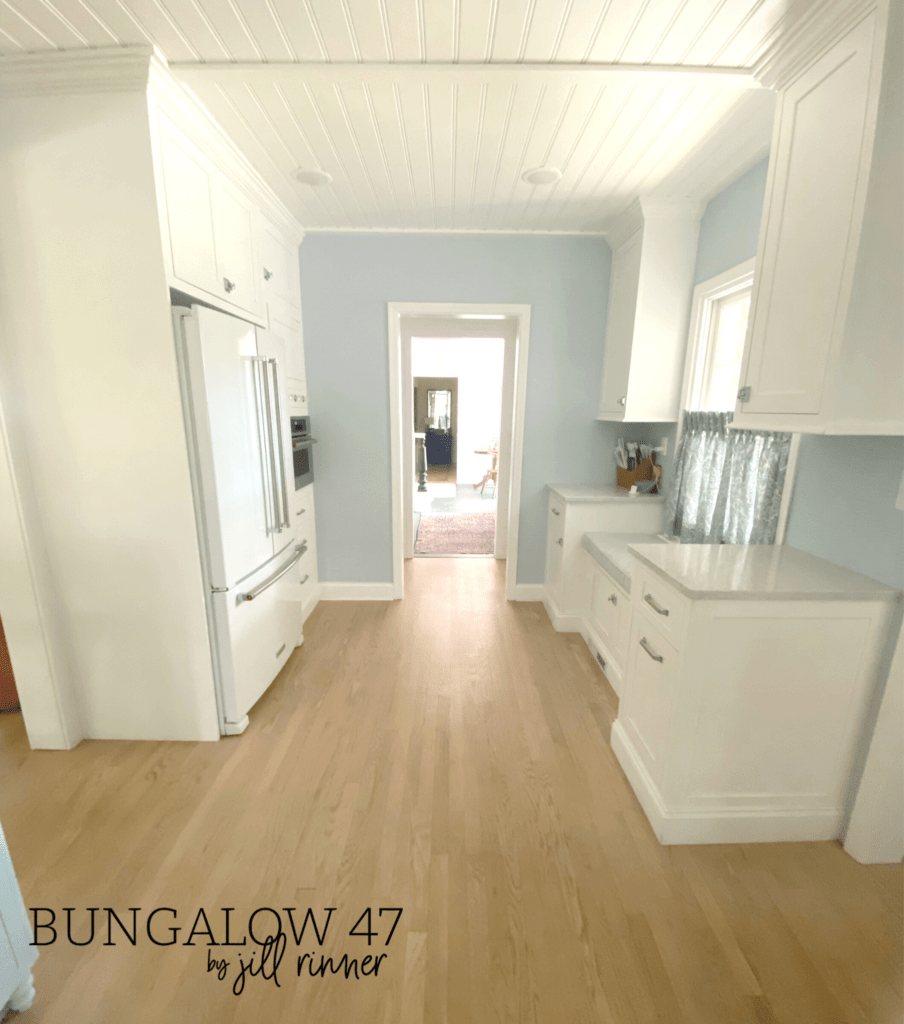
When we moved into our home a few years ago, we began the renovation in the kitchen. The ceiling had some weird old built-in lights and a fan which left large holes in the plasterboard upon removal. I knew I wanted to put beadboard on the ceiling, so I wasn’t too worried. When the electricians came to install all the updated electrical, they loved that they didn’t have to worry about damaging the ceiling. After all, we would be covering it with the MDF panels so there were no worries. It looked like Swiss cheese when they were done!
I found online at Home Depot a really great beadboard wall panel. The beaded area was wider than normal and I headed to the store to check it out. Of course, they didn’t have enough so we ordered online our quantity needed and had it delivered. Although my Pacifica van will fit a 48 inch wide piece of plywood, I needed like 30 sheets of the wall panel. Home delivery was a much better option, and the price was reasonable and worth it.

Get Help to Install
Although most DIY projects I end up doing myself, this one would require me getting help. Due to CoVid, I was knee deep in projects and was in need of assistance. After gathering all the tools, we got to work.
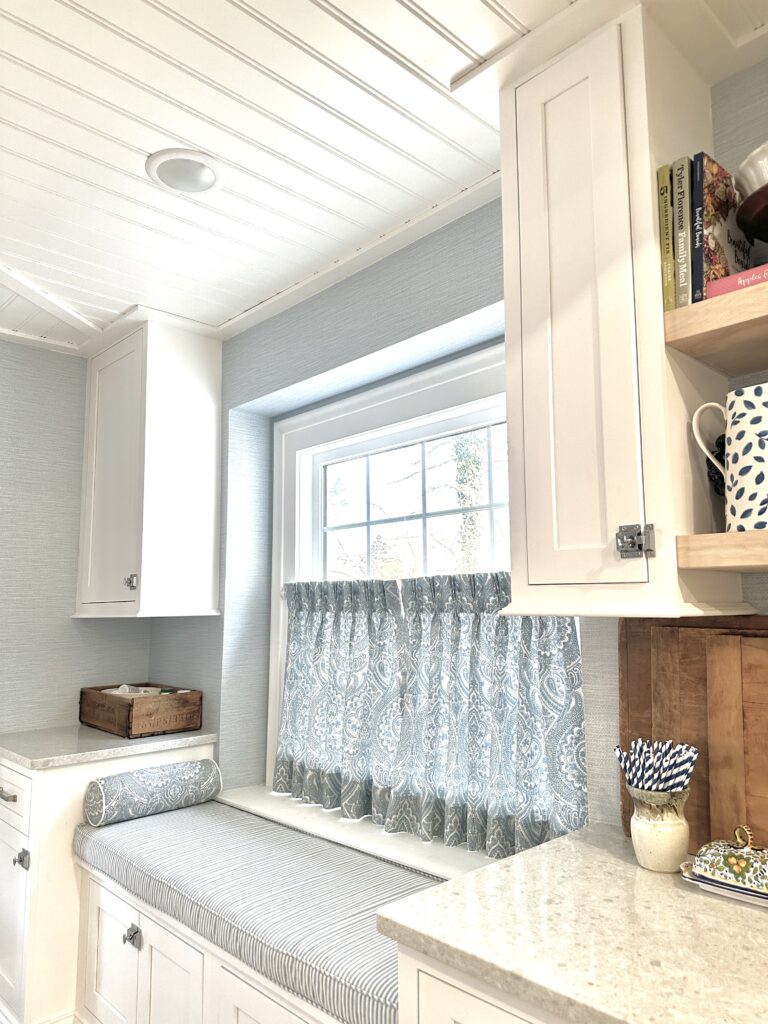
I applied liquid nails to the back of the MDF and had my husband and son hold it up against the ceiling while I attached it with the nail gun. The nail gun is one of my favorite tools! With 3 people, it was much easier to install. The 48 inch panels butted up against a beaded line and were easy to match. I used wood trim to hide the cross seams.
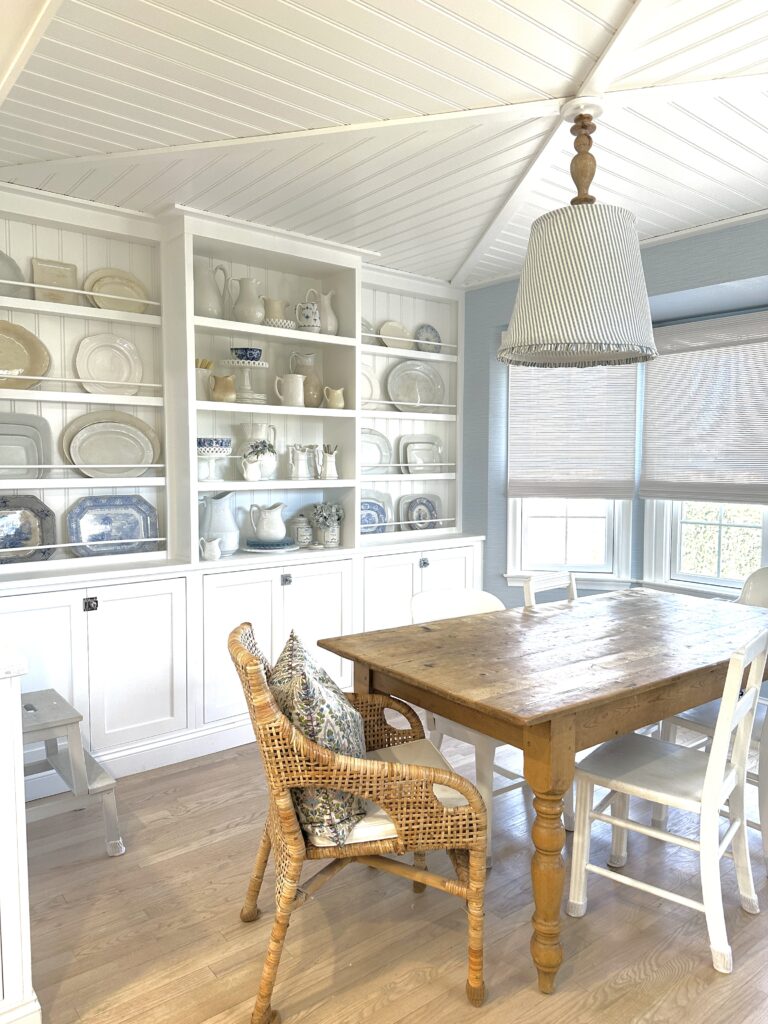
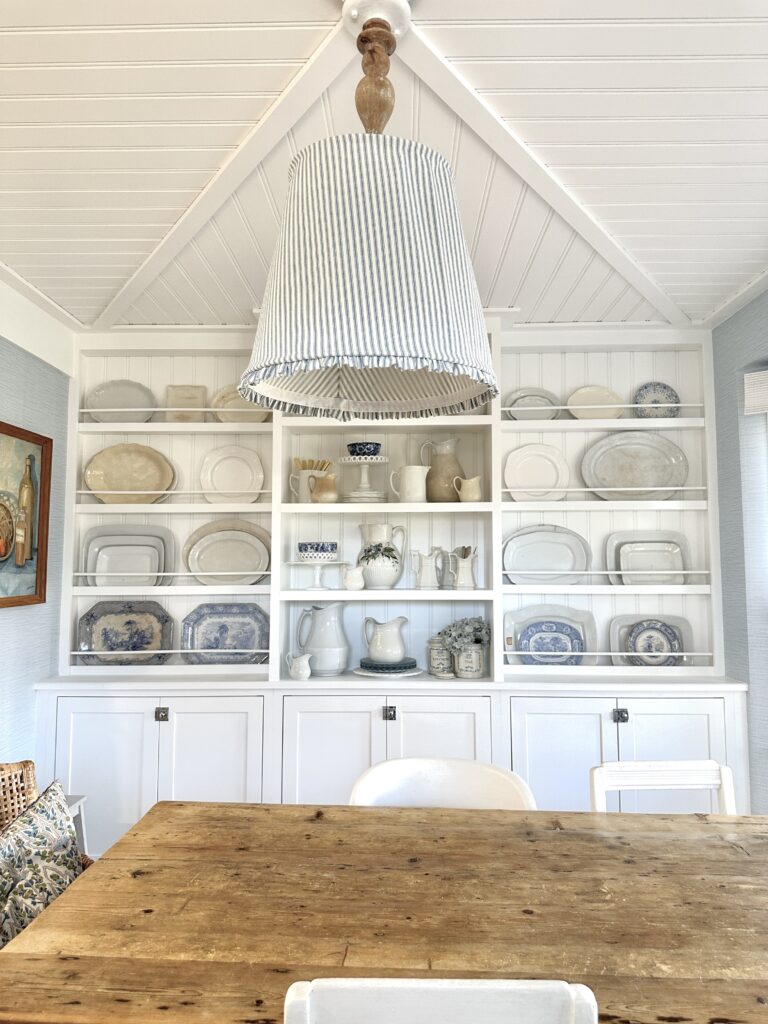
When it came to our dining area in the kitchen, there was a beam that ran across the end of the kitchen so the nook ceiling was self contained. I wanted to step it up a bit and do something fancy. This required a bit more math and a good eye to make sure the beaded lines would match when they all came together. I also used the wall panel behind the built-in hutch I made. All the beaded panels were trimmed with wood boards and painted white.
Finishing the Wall Panel
All the panels in the kitchen were sprayed with a crisp white paint and create great architectural interest. Your line of site entering the kitchen runs along that beaded line then leads you to the dining room with the X detail. The wider beaded panels really look authentic and although those panels cost more than standard panels, they were worth it. You can find them in your local Home Depot store.
Leftover Wall Panel
Because I had to cut the beaded panels to fit my space, I had lots of leftover. No worries there, I had a plan. I already had earmarked panels for the mudroom and half bathroom. I had even more that ended up being just enough for the guest bedroom, where I would choose a fun color for that space.

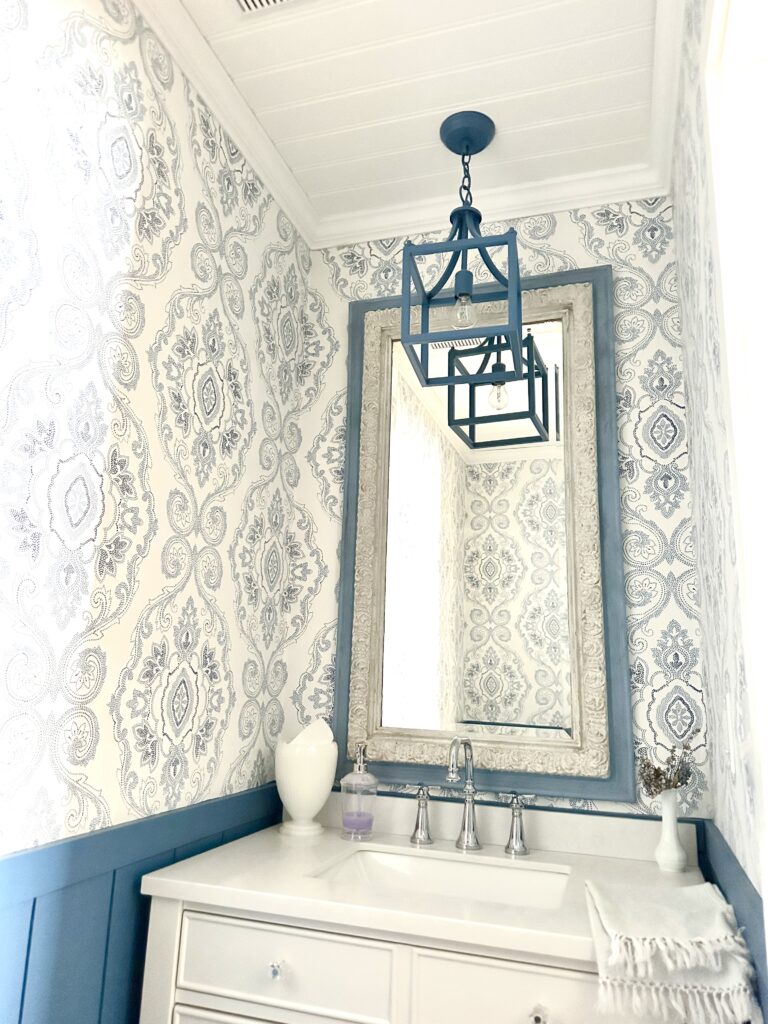
For that project, I was able to stick them on the wall a bit easier, and by myself since I was dealing with smaller pieces. The beaded panels really add something special to this room. I ended up having a bit left, and was able to use the last bit on the ceiling in the bathroom. I added some wood crown moulding, and it all came together beautifully.
Which Wood Panels Will You Choose?
Beadboard is a great way to make a boring room seem special. The trend has been popular for so long, I think it’s going to stick around. It may just be time for you to head to the store and grab some beadboard for your next project. The availability is way better now that CoVid shortages are easing.

Check local lumber yards as well as your big box store for a variety of options. The price of wood is up some, and MDF isn’t much cheaper. But the look beaded panels gives is timeless and adds good form as well as function in many spaces.
For a price I thought would cover one room, it ended up supplying enough for my three projects. Follow me on Pinterest for more decorating inspiration.
